Showing posts with label Tuesday's Tips. Show all posts

Tuesday, February 4, 2014

Tuesday's Tips and Tricks: Navigating the MQG site

As you know the Orlando MQG has officially joined the Modern Quilt Guild and all paid members should have received an email by now from the MQG welcoming you and providing a link to the main site where you can set up your profile. If you have not received this email, please contact Rene' or leave a comment here, and we will make sure you get set up.

The website an be a little tricky to navigate at first, but I encourage you to take a little time to browse the site and familiarize yourself with the various tabs.  Quite a bit of chatter and useful information is available in the Forums, and we can add what we would like on our own group page.  To help us customize our page, please leave a comment on topics you would like to see discussed on our group page as well as other features desired.

If you haven't already, I recommend subscribing to the MQG newsletter by email to ensure you do not miss any important benefits.  Since our guild has joined, one free pattern has already been released for download.  This will be a regularly monthly feature in 2014.

Below are a few helpful links on the MQG site:
  • The direct link to our Orlando MQG group guild page:  http://community.themodernquiltguild.com/groups/orlando-mqg-0 Please make sure you "Join" the Orlando MQG as well as clicking to "Follow".  If posts are public (as most of ours are now), you will be allowed to comment even if you haven't joined.  I have noticed that some members have activated their profile but not joined our group.
  • "Community Site How-To Webinar" can be found here: http://community.themodernquiltguild.com/groups/community-site-how-webinar
  • "Join/Subscribe to your group" help topic: http://community.themodernquiltguild.com/forums/help
  • "How to Use Forums" help topic:  http://community.themodernquiltguild.com/groups/how-use-forums
Have fun exploring the Modern Quilt Guild site and let us know what you want to see on the Orlando MQG page!

Tuesday, October 1, 2013

Tuesday's Tips and Tricks

It's been a while since our last Tuesday's Tips and Tricks.  Today's tips are brought to you by guild member Jackie.  Thanks Jackie for sharing your suggestions.


  • A flat iron is a terrific tool for small ironing jobs.  It sure makes binding lay flat.
  • Build a Bear Workshop sells stain remover ($7) for cleaning spots off stuffed animals.  Seems this might work well on arts quilts that can't be washed. 

As a reminder, our guild has a Pinterest board which features many tutorials and techniques you might find useful.  Please let us know if you have a tip or technique you'd like to share.   Happy stitching!

Tuesday, July 2, 2013

Tuesday's Tips and Tricks: Binding


There are various techniques for binding a quilt whether you choose to hand stitch or machine stitch the binding.  Below are just a few that provides tips for attaching and stitching your binding by machine:

  • Pink Chalk Studios has compiled four different machine binding techniques in one blog post.  This is definitely worth reading.
  • Aunt Marti has a tutorial on machine binding with a flange.  The resulting look is impressive.
  • From my good friend Mary, this tutorial for machine binding was featured on Sew, Mama Sew.
  • This tutorial is a two-for-one:  a mug rug tutorial that includes directions for "cheater binding".
Do you have a particular method for quilt binding? Please do share, and if there are any tips you would like to share or if you would like information on a technique feel free to leave a comment here.

Happy stitching!

Tuesday, May 28, 2013

Tuesday's Tips and Tricks

Welcome to another edition of Tuesday's Tips and Tricks.


Member Jackie sent in these useful tips for marking quilts: 


  • Plain white chalkboard chalk works well in marking quilts. The colored chalk has chemicals in it that might stain the fabric, so don't use that. Crayola is recommended.  A fabric lint brush brushes it off.
  • I tried washable markers to mark a quilt. The first time I tested them I left them on for a couple of minutes and I washed the fabric in warm water. Came right out.  Next I tested them further by leaving them on the fabric for an hour. The light colors came right out. The darker ones took a little soap and left a faint line. 
  • Tape Regular vinyl to a quilt top. Mark your quilting test designs on the vinyl with a dry erase marker. Erase with a square of batting. There, now you have auditioned your quilting design on the quilt before machine quilting it. 
From our Pinterest board:
We want to hear from you.  Have a tip or technique you'd like to share?  Email us, and we will include your suggestion in a future post. Thanks and happy stitching!


Tuesday, April 30, 2013

Tuesday's Tips and Tricks: Tutorials to Help

Let's talk tutorials.  Did you know the OrlandoMQG has a Pinterest board full of links to tutorials?!  If you aren't already following us on Pinterest be sure to click here to see our boards and to follow.


Here are a few recent tutorials that have peeked my interest:

HappySewLucky's Love flag tutorial
Happy Sew Lucky's Peace Hexie pattern
This post on the VancouverMQG's website has links to two free pattern downloads as well as links to other heart related tutorials.

Quilters are generous by nature and the online quilting community doesn't hesitate to answer a call for help.  Right now I am aware of two projects currently asking for help from quilters for Bostonians.  Below is some information with links if you'd like to contribute your quilty skills.

logo

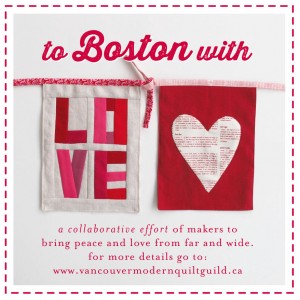
First is the "To Boston With Love" effort spearheaded by the Vancouver Modern Quilt Guild to collect flags to string in a public exhibit to show feelings of love, peace and healing.  Please note the deadline of the flags to be received in Boston has been moved up to May 21st.  More information about the date change can be found on Amy's blog.

Quilts for Boston

Second is the "Quilts for Boston" campaign organized by the BostonMQG to collect quilt blocks for assembling into quilts for those in need of comfort.   They are requesting blocks 12.5" tall and any width (similar to the QuiltCon block challenge) in the colors of blue, yellow, gray and white.  The deadline for the receipt of these blocks is May 24th.

All information regarding these two projects can be found in the links referenced above.  Additionally, there are Flickr groups already overflowing with pictures of flags and blocks made for inspiration.

Tuesday, April 9, 2013

Tuesday's Tips and Tricks: Paper Piecing and Pressing

At Wednesday's meeting Alejandrina showed us her tips for pressing (not ironing) fabric and pressing seams which was very informative and included a discussion of whether to press seams open or to the side which led to members discussing other tips, offering suggestions and asking questions.


  • Alejandrina recommended a product she discovered at QuiltCon by teacher Susan Cleveland.  The Whacker  helps flatten bulky seams without constantly running to the iron.
  • Love suggested using a brayer-type roller (such as used for wallpaper) for pressing seams when paper piecing, again without constantly running to the iron.  
  • Penny of SewTakeAHike recommends the Curve Master seam roller in her paper piecing classes as this seam roller is beveled rather than flat so the fabric doesn't get warped while rolling.
  • Mary Ellen's Best Press is a popular spray starch product used in pressing.  There are several links for making your own:  here, here, here, here and this one using Vodka!  I haven't tried any of these so can't recommend one over the other.
  • Yanick recommends this ruler for marking your sewing machine for the elusive scant 1/4" seam!
  • Carol Doak has a YouTube video (which would have helped me tremendously yesterday if only I had known) which shows how to remove a paper piece that was sewn on backwards.
The question of how much does a yard of fabric weigh was posed.  I found conflicting answers on the Google.  Does anyone have input on this topic?

Tuesday, April 2, 2013

Tuesday's Tips and Tricks: Fabric and Colors

Here are some tips when matching fabric and thread for your project:


Jackie offers this tip she found for organizing paint samples and adapted to quilting purposes:

Cut a two inch square of each of the fabrics you want to find coordinating fabric and thread for; punch a hole in the corners; slip onto a key chain; take these with you to the fabric shop to match fabric and thread color.

Speaking of color, The Modern Quilt Guild's Week of Color Tutorials on the MQG website is a great reference.  My favorite (and one I really need to make) is by Sew Katie Did on color value.


One tip I have regarding choosing colors that work well together in a quilt is to look to nature.  Design Seeds is a wonderful website that features glorious photographs and their color palettes.


Last week's post included discussions on free motion quilting.  I have found another post that provides quite a bit of information and links to even more information.  Check out Katie's FMQ post.

How are you enjoying these Tuesday's Tips posts so far?  Any comments or suggestions?  Let's keep those tips and tricks coming!


Tuesday, March 26, 2013

Tuesday's Tips and Tricks: First Edition

Welcome to the first edition of Tuesday's Tips and Tricks!  You asked and we listened....Here you will find tips, techniques, tricks and products related to quilting that have been vetted by our members.  Occasionally a question will be asked by a member seeking help with a particular quilting issue.  All of us have knowledge, skills and experience that we can share with others;  each of us can benefit and learn from the talents of our fellow guild members.  Let's get started!


Jackie offers these tips regarding needles:
  • When threading a needle for hand stitching, insert the needle into a square of folded fabric.  Hold the fabric rather than the needle when threading.
  • When switching sewing machine needles, leave a strand of thread in needle after removing to remind you this is a used needle.
Cara shares this trick for those of us who can never cut the fabric large enough when paper piecing:
  • First photocopy an extra copy of the pattern and cut out the pieces.  Then as you get to each piece, lay the paper pattern piece on your fabric and cut around always leaving at least 1/4" and preferably a good bit more.  You don't need to cut in the exact shape (although this helps for knowing which way it goes), just loosely around it, making sure you have plenty of fabric to cover the area.  Now you have a piece that is sure to cover the needed area.
Debra asked for suggestions on how to quilt like a longarmer on her home sewing machine.  Does anyone have any tips or tricks for her?  If so, please leave them in the comment section.

I found a few on Pinterest that may be of use.  Check out these links:  
I am sure there are many other links to tutorials, videos, blog posts and other resources for helpful suggestions on free motion quilting.  Please share any that you find helpful!

Have a tip or trick you want to share with members?  Are you searching for tips or techniques for a particular project?  Please email Rene' (address in member directory) with any questions, comments or suggestions for inclusion in the Tuesday's Tips and Tricks column.   

Happy stitching!